Go To: Menu > Settings > Yezza > Advanced Setup > Facebook Pixel > Manage
To copy Facebook Pixel ID;
> Login to your 'Facebook Business Account'
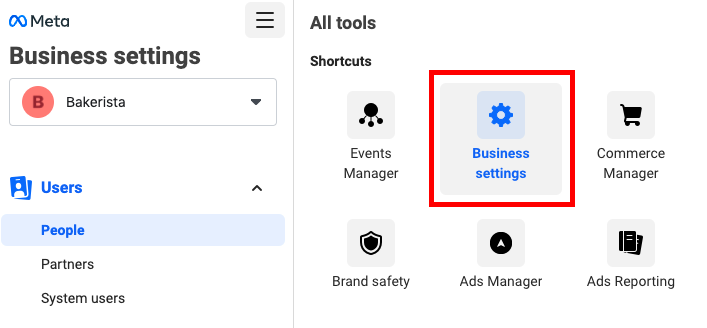
> Go to 'Business Settings'
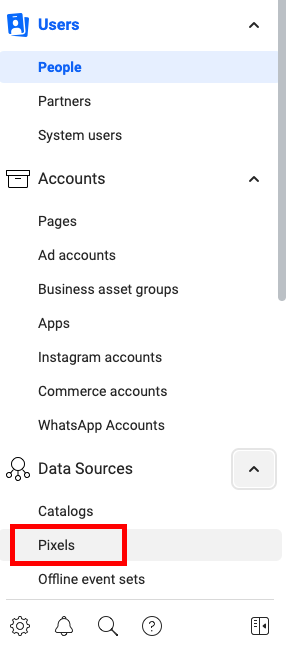
> Choose 'Data Sources'
> Click 'Pixels'
> Copy your 'Pixel ID' (numbers in blue text)
To set Facebook Pixel on Yezza;
> At Menu, click 'Settings'
> Choose 'Yezza'
> Choose 'Advanced Setup'
> Navigate to 'Analytics'
> Click 'Manage' on 'Facebook Pixel'
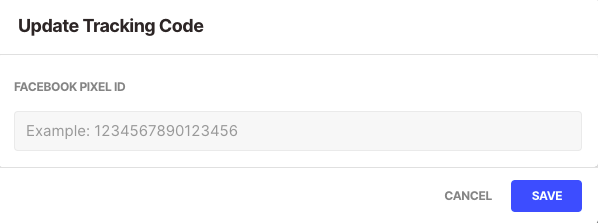
> Place your Facebook Pixel ID
To get your own Facebook Pixel ID, you will have to have a Facebook Business Account first. Head over to business.facebook.com/create to create an account if you do not have an account yet.
To learn more about Facebook Pixels and how they work, see Facebook Pixel.
This article contains the following sections:
Getting your Facebook Pixel ID
- On the left panel, go to <Business Settings>.
- Then choose <Data Sources> and click <Pixels>
- Usually a pixel is already created for you with successful registration. If not, continue with the steps.
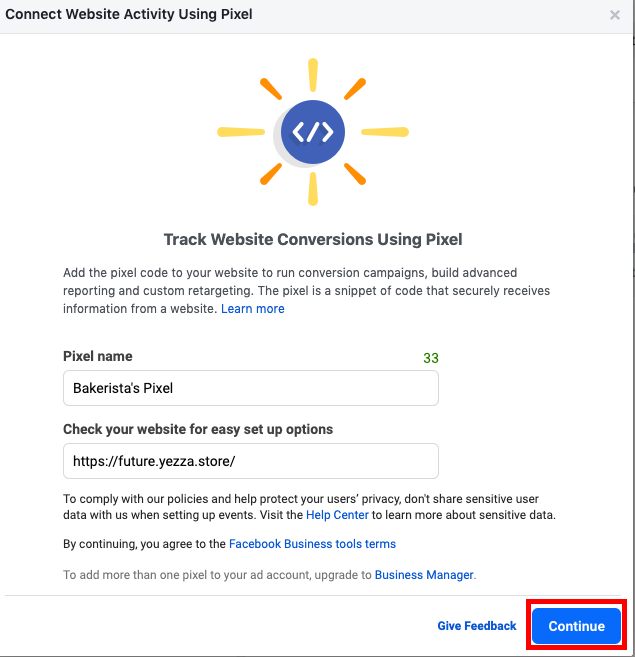
- Click <Add>
- Enter your pixel’s name then <Continue>.
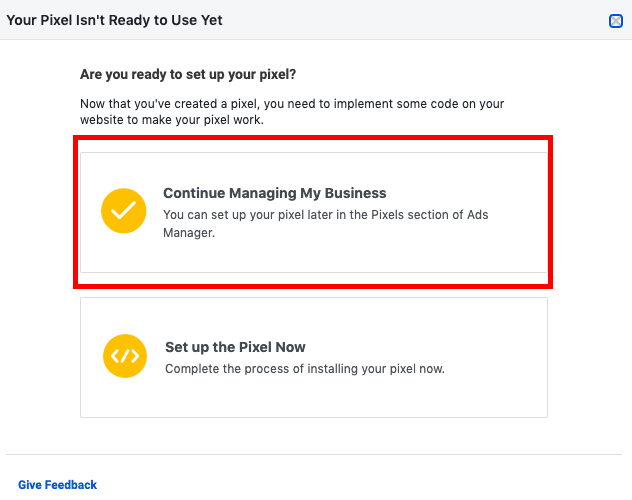
- Click <Continue Managing My Business>
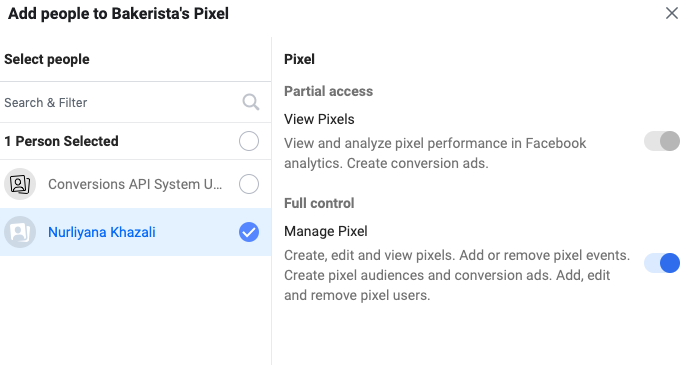
- If there were no name. in People , click <Add People>.
- Choose a name to manage your pixel date. Ensure that you have activate the Full Control option. and activate admin access. Click <Assign> when finished.
- Click at the blue coloured number next to ID.
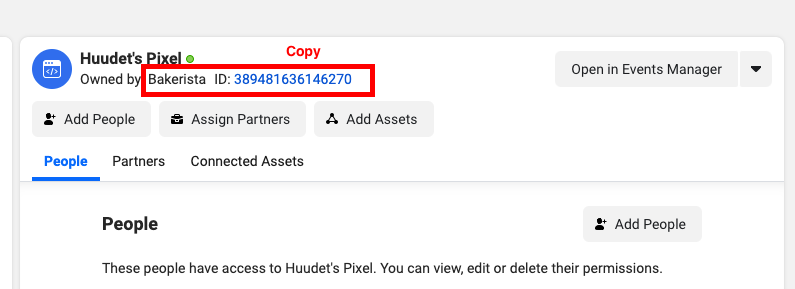
- Open your Yezza appPaste the ID at Setup > Advanced Setup > Integration > Facebook Pixel
Note : Notice the red colour indication next to your pixel’s name. It shows that your pixel is yet to capture any activity.
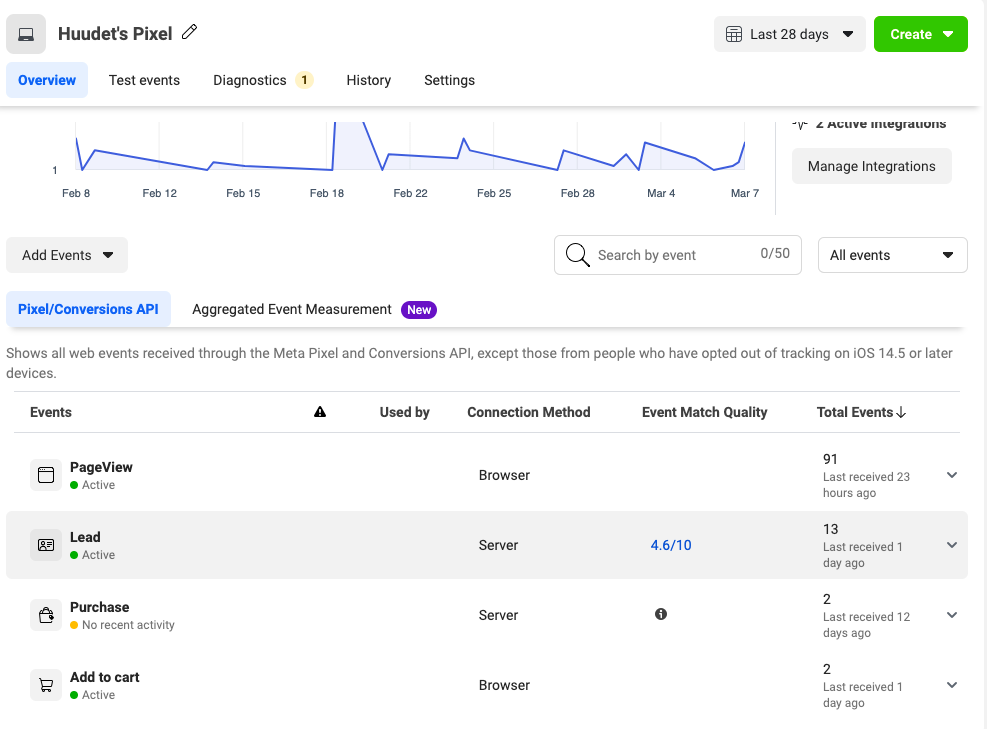
If you click <Open in Events Manager> you’ll arrive at a page where your pixel data are recorded and categories by Events.
You have the liberty to create your own Events manually or just use the pre-created events by Yezza. Use these events to create your audience.
Congratulations! Your WhatsApp Form and Yezza Store are now Pixel’ed

Comments
0 comments
Please sign in to leave a comment.