This article explains how users can verify their custom domain on Facebook Business Manager.
Important note: Only custom domains are allowed to be verified. Click here to learn how to apply for a custom domain.
Step 1: Open your Facebook Business Manager account at business.facebook.com
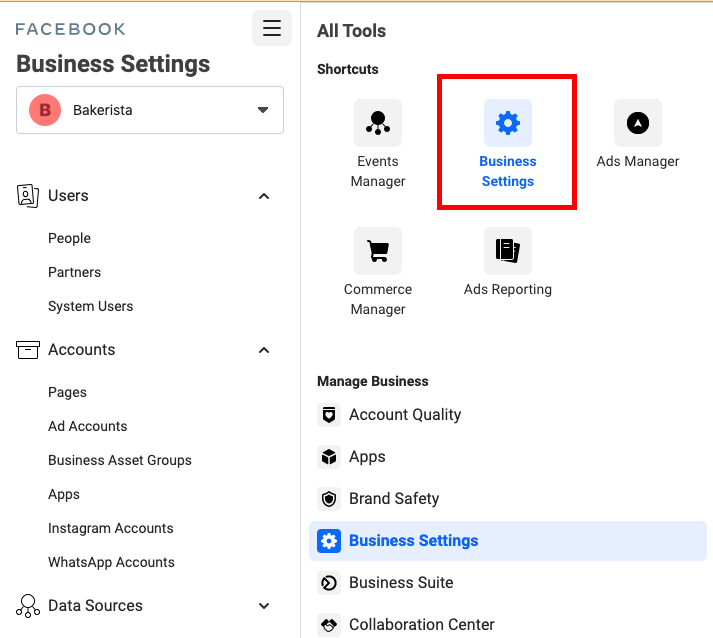
Step 2: Head to 'Business Settings'
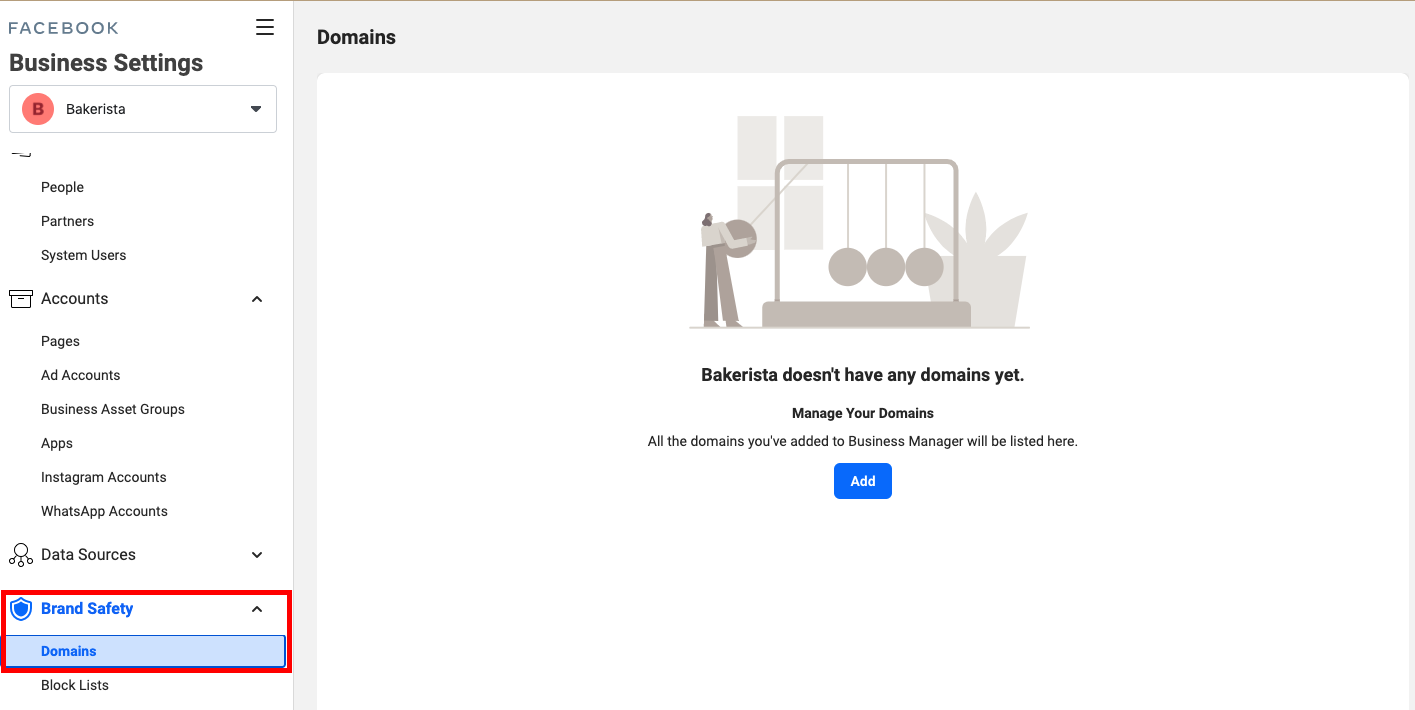
Step 3: Under the Business Settings menu, choose Brand Safety > Domains. Click 'Add' at this page.
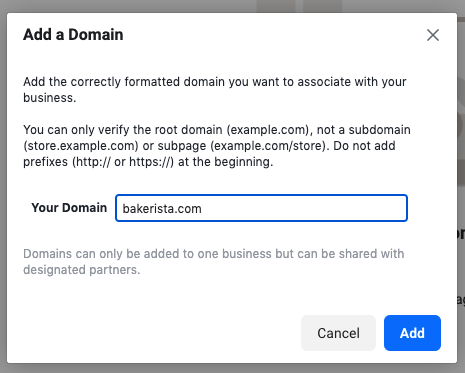
Step 4: Key in your domain name.
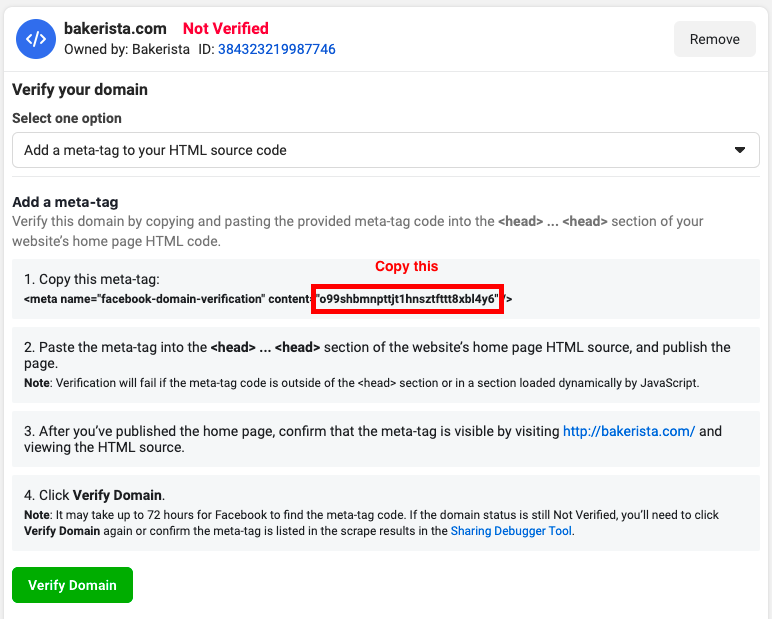
Step 5: Choose the option 'Add a meta-tag to your HTML source code'
Step 6: Copy the meta tag highlighted below.
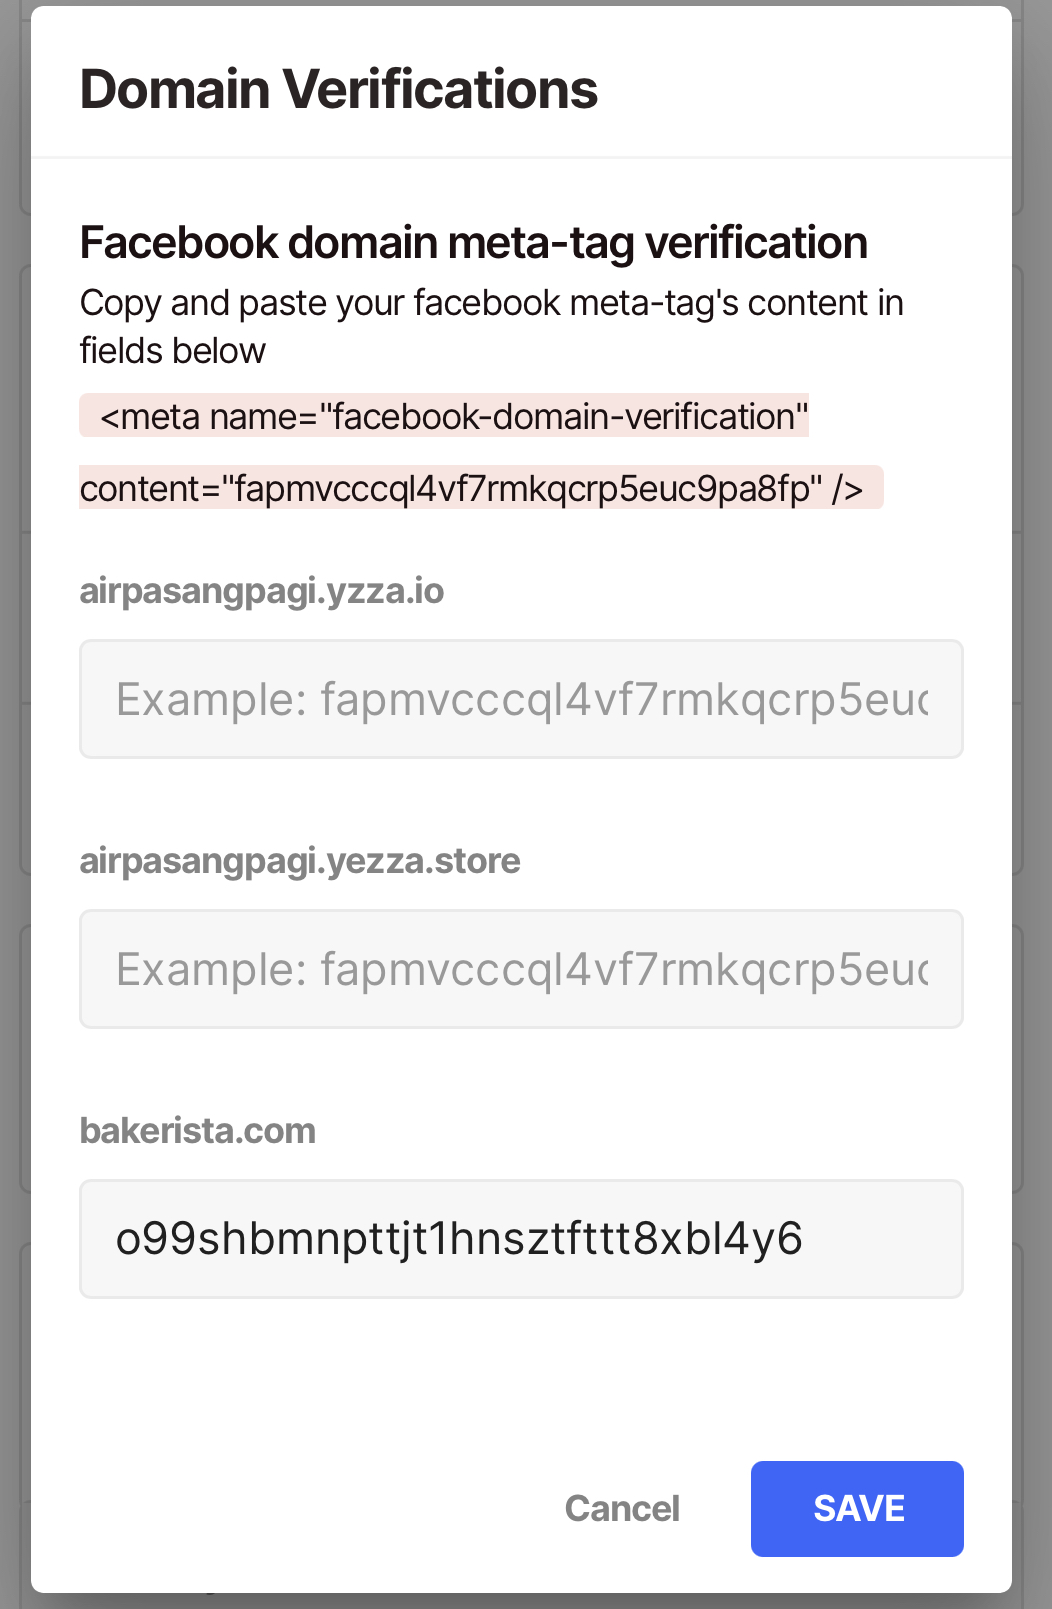
Step 7: At your Yezza app, head to Setup > Advanced Setup > Domain
Step 8: At Domain Verifications menu, click Manage. Paste the meta tag copied earlier at the Custom Domain box. User may ignore the first two fields.
Step 9: Click Save
Step 10: Return to your Facebook Business Manager page and click Verify.
Comments
0 comments
Please sign in to leave a comment.